How to Release New Versions
How to release new versions of our pipelines and tools using our semi-automated workflow.
Check the repo contents
Ensure it contains the following files:
CHANGELOG.mdorNEWS.md- The first header should be
## development version. - Under the header, keep a bulleted list of user-facing changes & links to the PRs that added them.
- If you don’t have any entries under the development header, make sure you’re updating the changelog with each PR that contains user-facing changes.
- The first header should be
VERSION- Containing only the semantic version.
- If the version file is in a subdirectory, create a symlink at the repo root.
- If your repo is an R package, you don’t need this file because the version is in the
DESCRIPTIONfile instead.
.github/workflows/draft-release.yml.github/workflows/post-release.yml
Run the tests on the development branch
If you haven’t already, run the test suite on the development branch. If your repo is a pipeline, use the test dataset/profile/configuration and make sure it completes without errors on Biowulf. If your repo is a Python or R package, the CI workflows should complete successfully in GitHub Actions.
Do not cut a release if any of the tests fail or if the pipeline throws errors during the test run. We only want to release working software!
Run the draft-release workflow
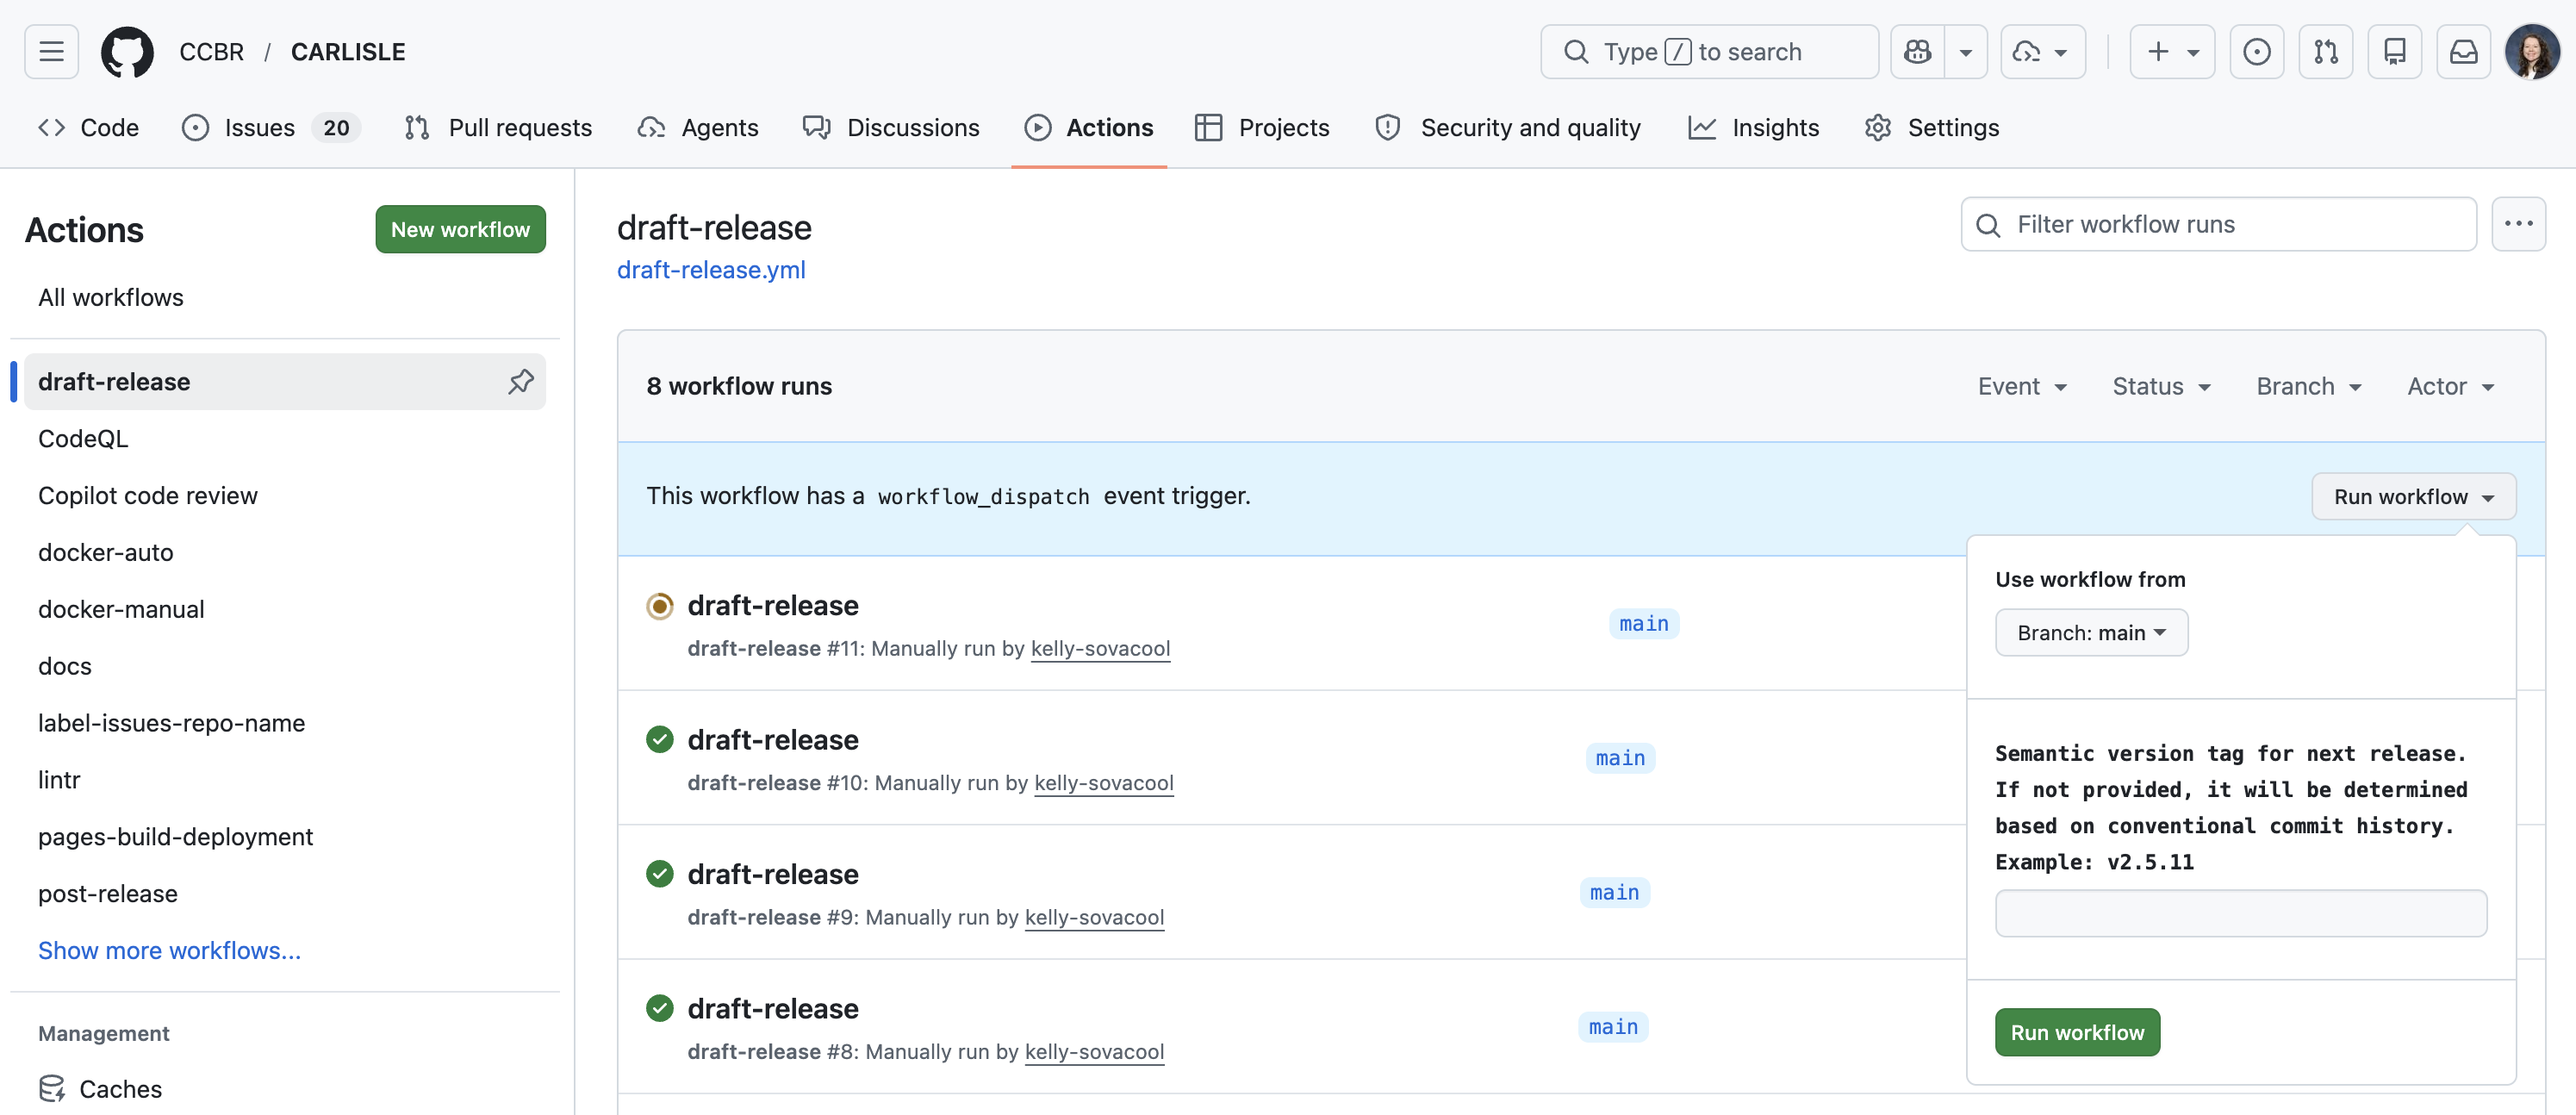
Cut the release
Once draft-release completes successfully, a new draft release will appear under the releases page
https://github.com/CCBR/<REPO>/releases
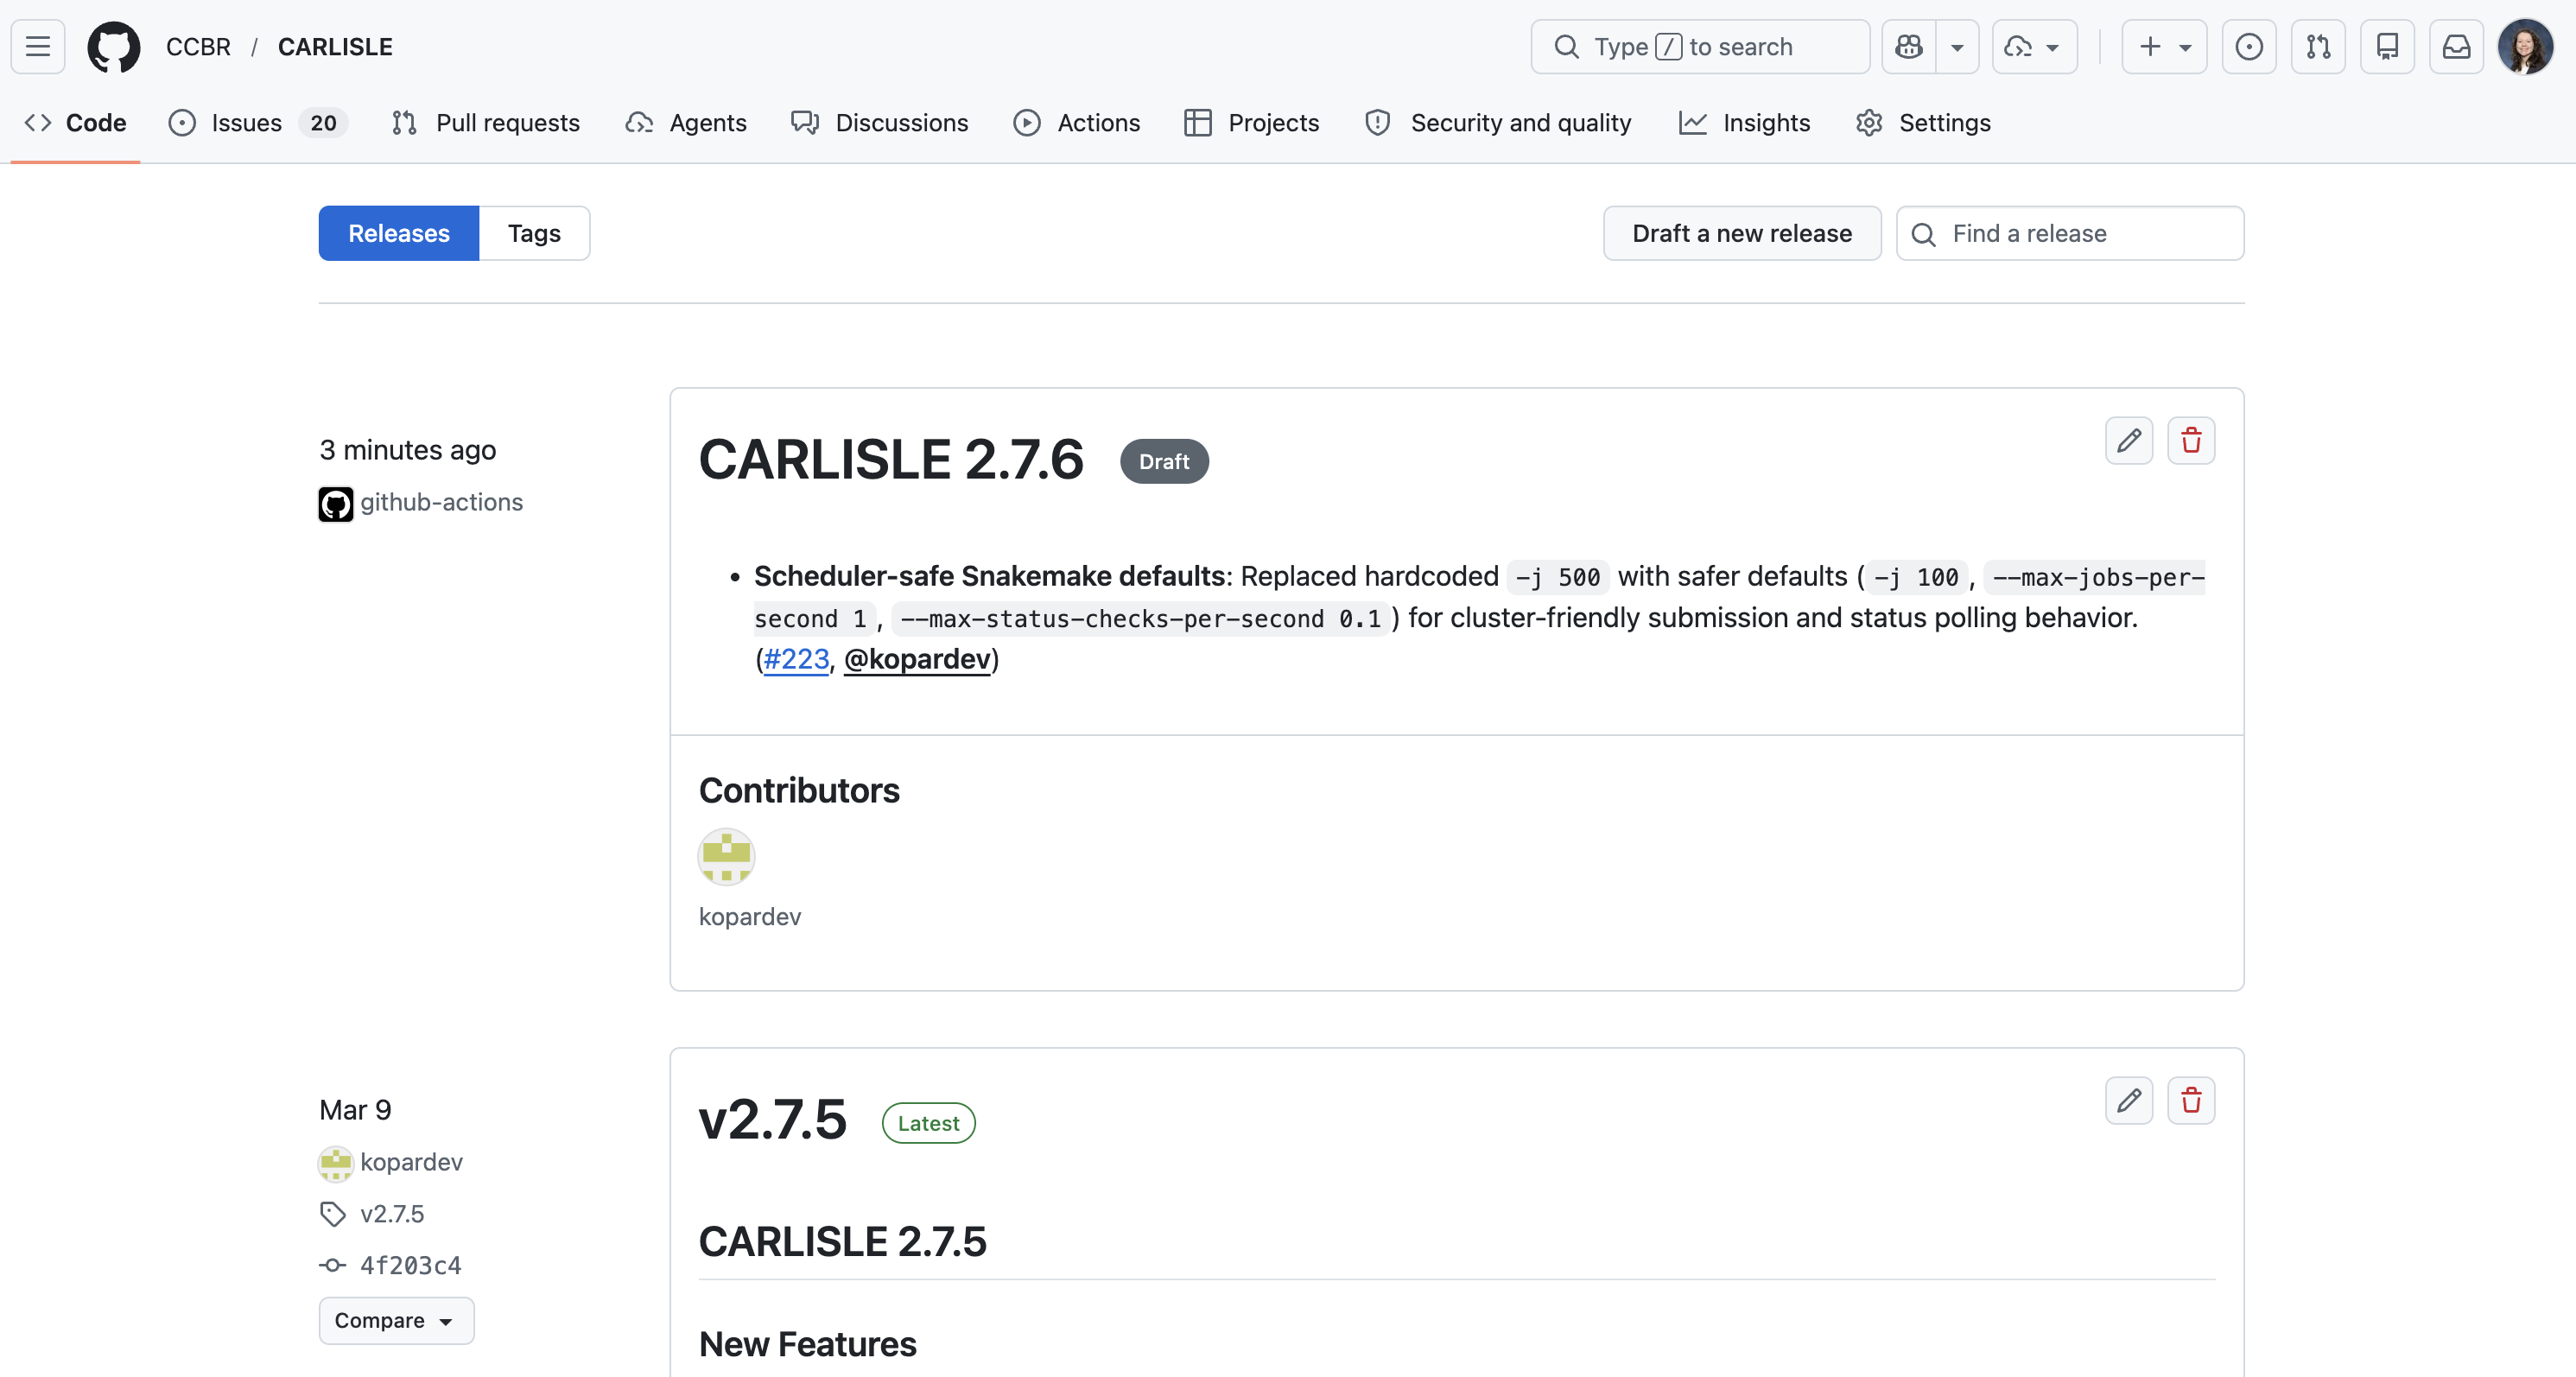
Click the pencil icon to edit the release.
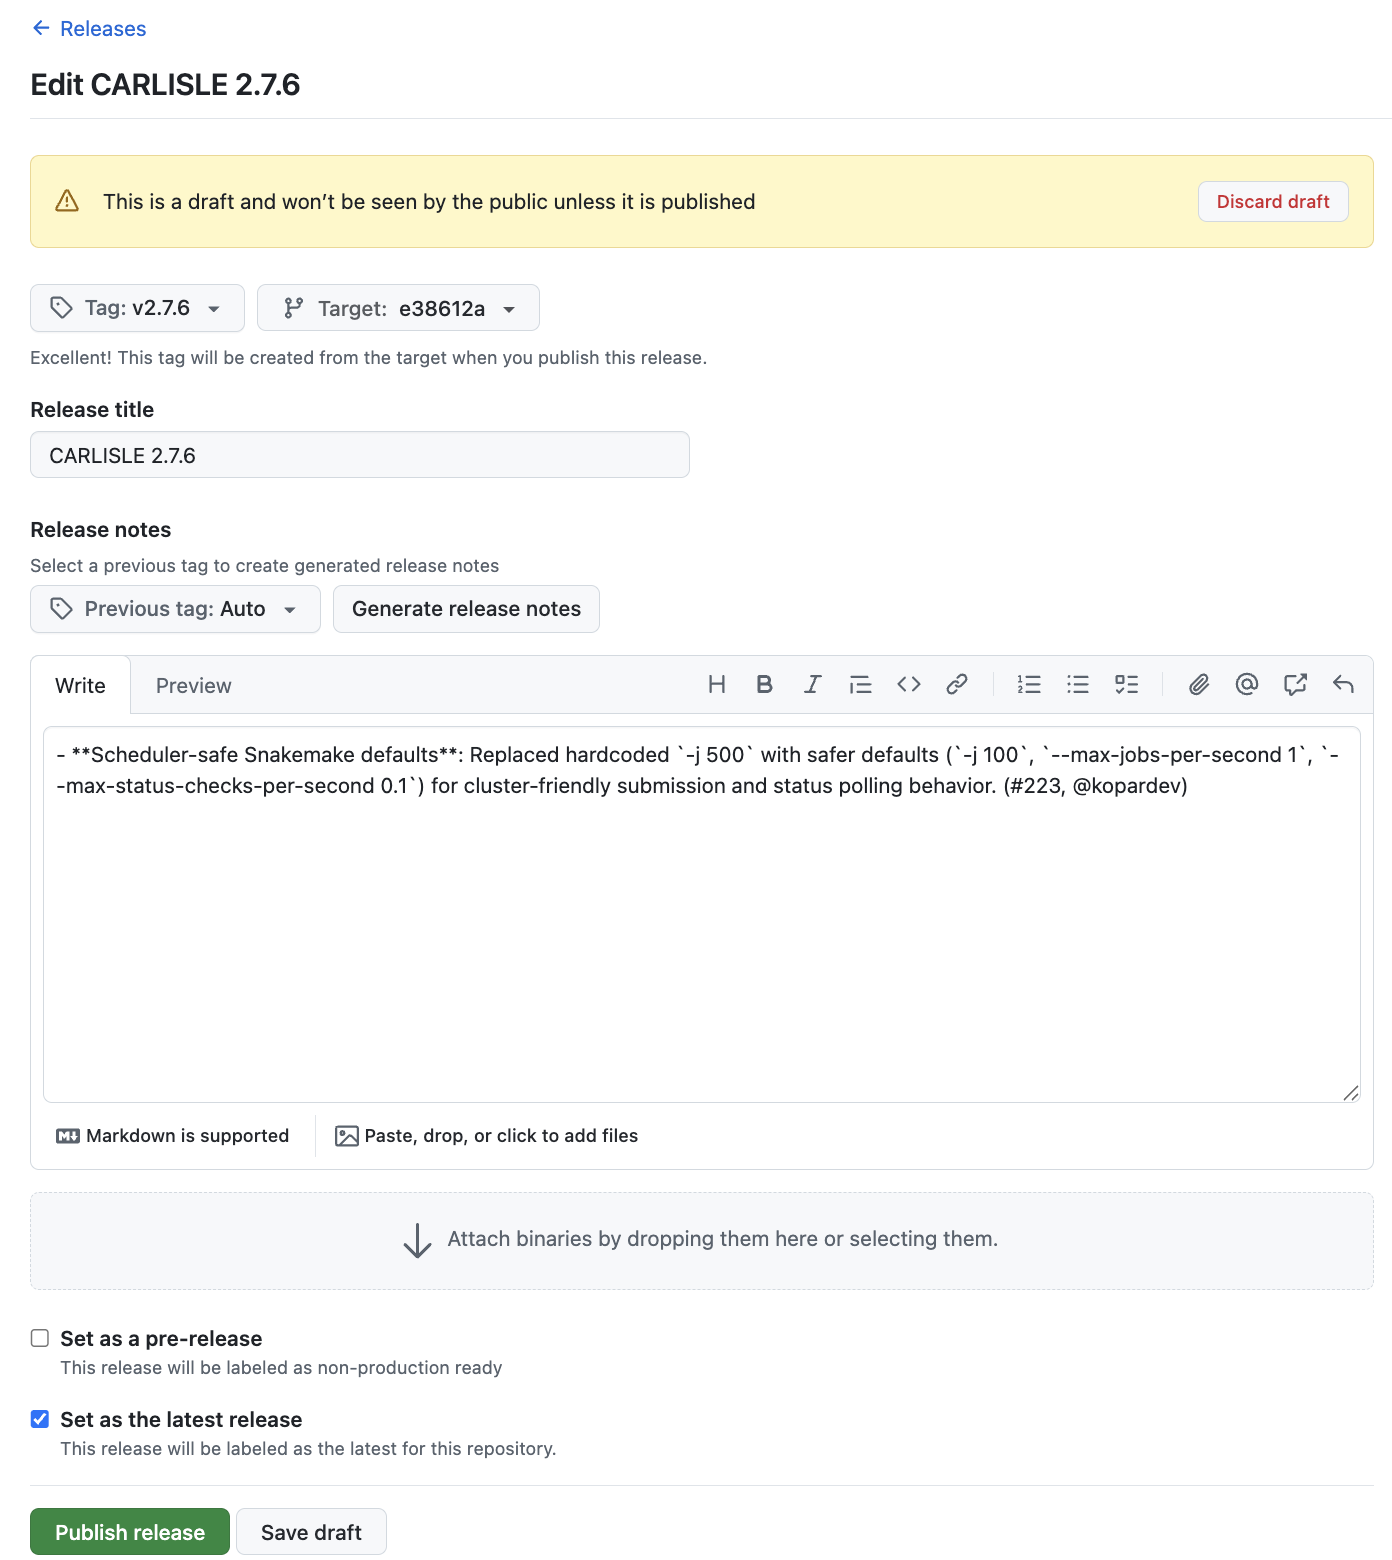
If everything looks good, scroll to the bottom and click “Publish release”. This will trigger the post-release workflow to run, which will then open a Pull Request (PR) if it completes successfully. It should take < 2 minutes.
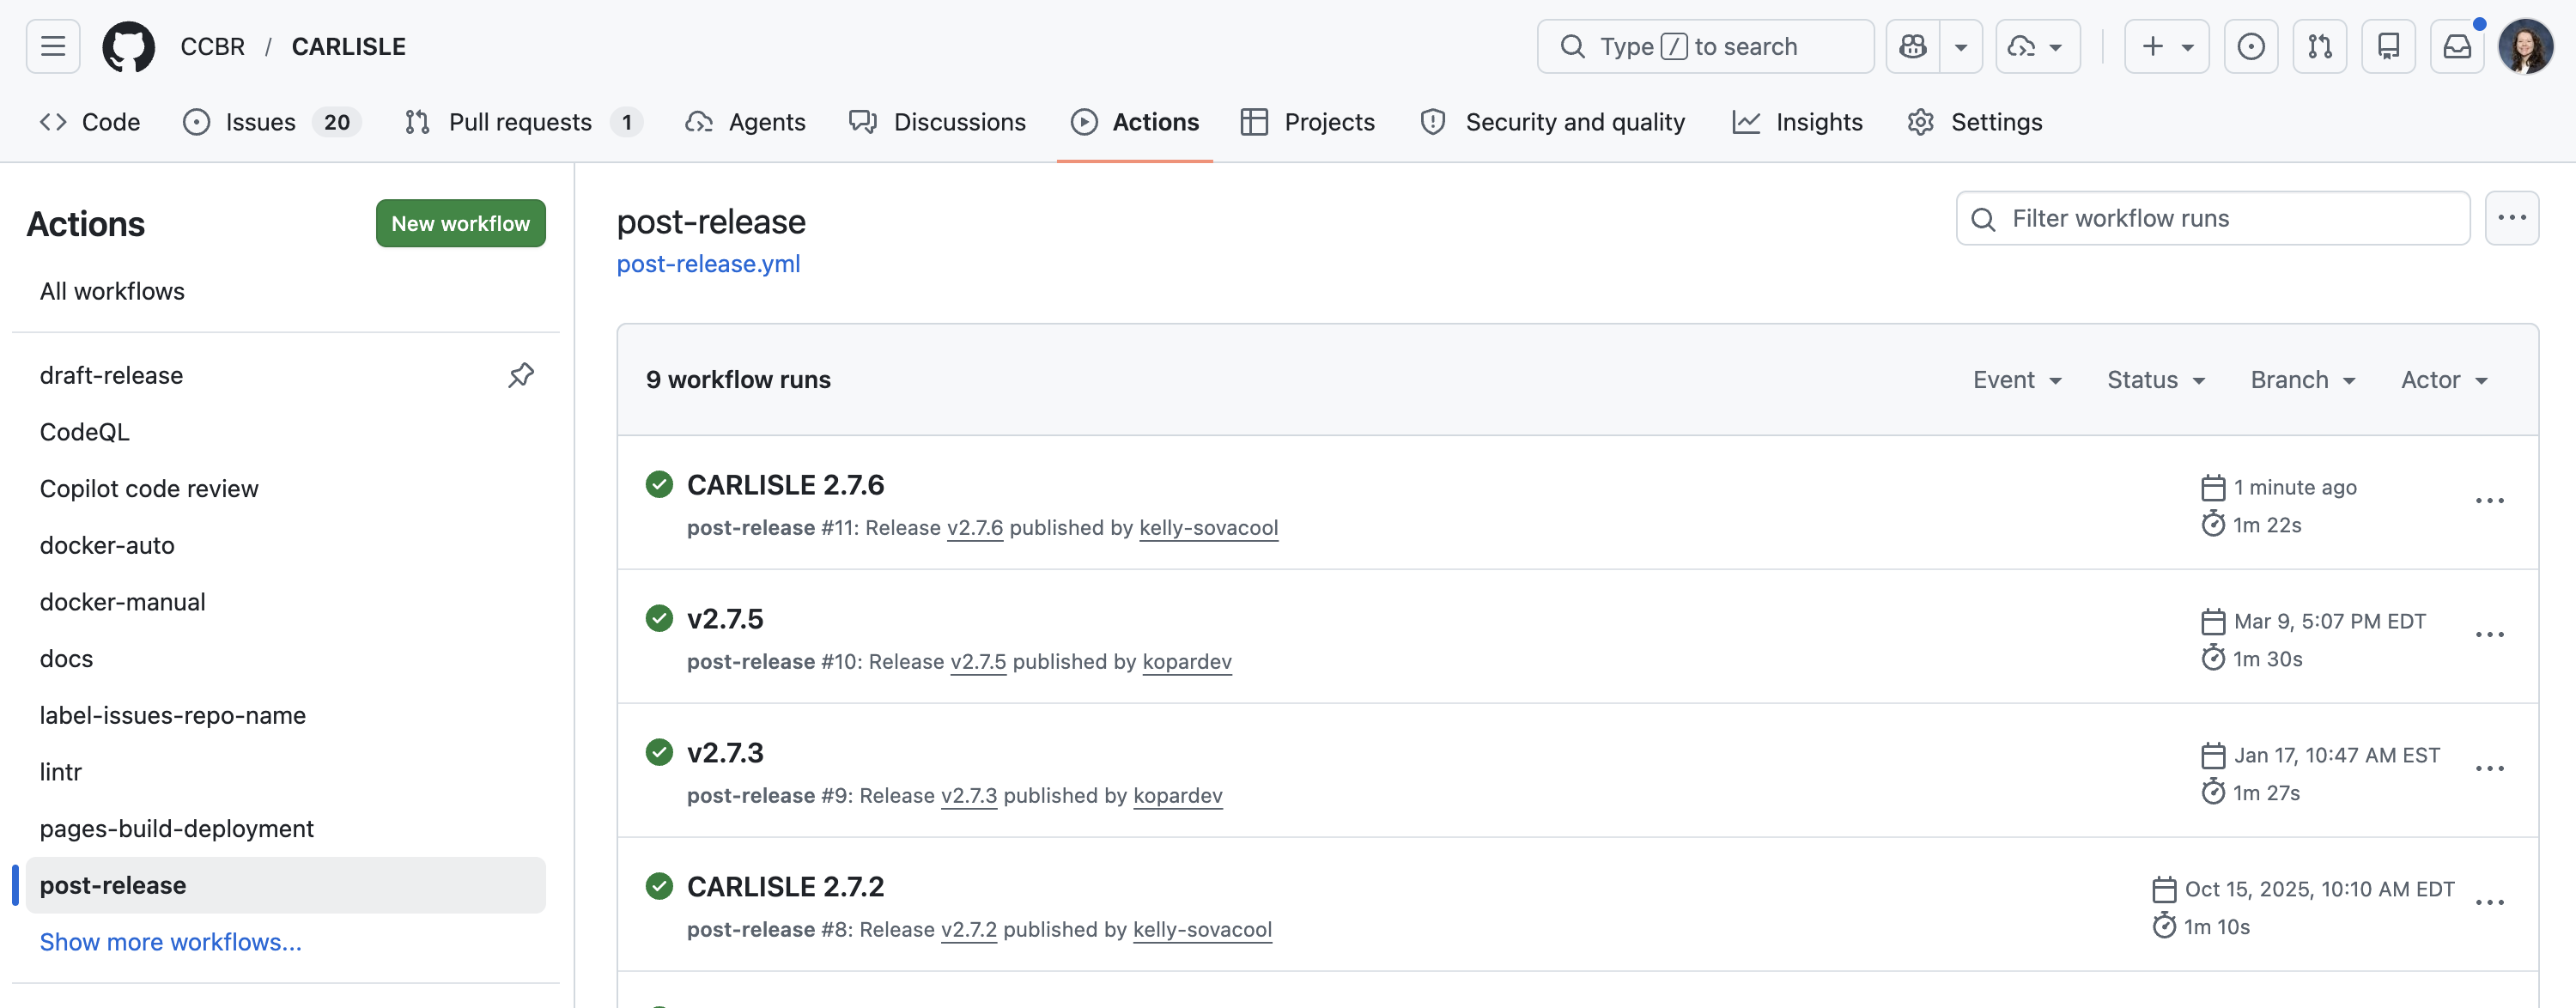
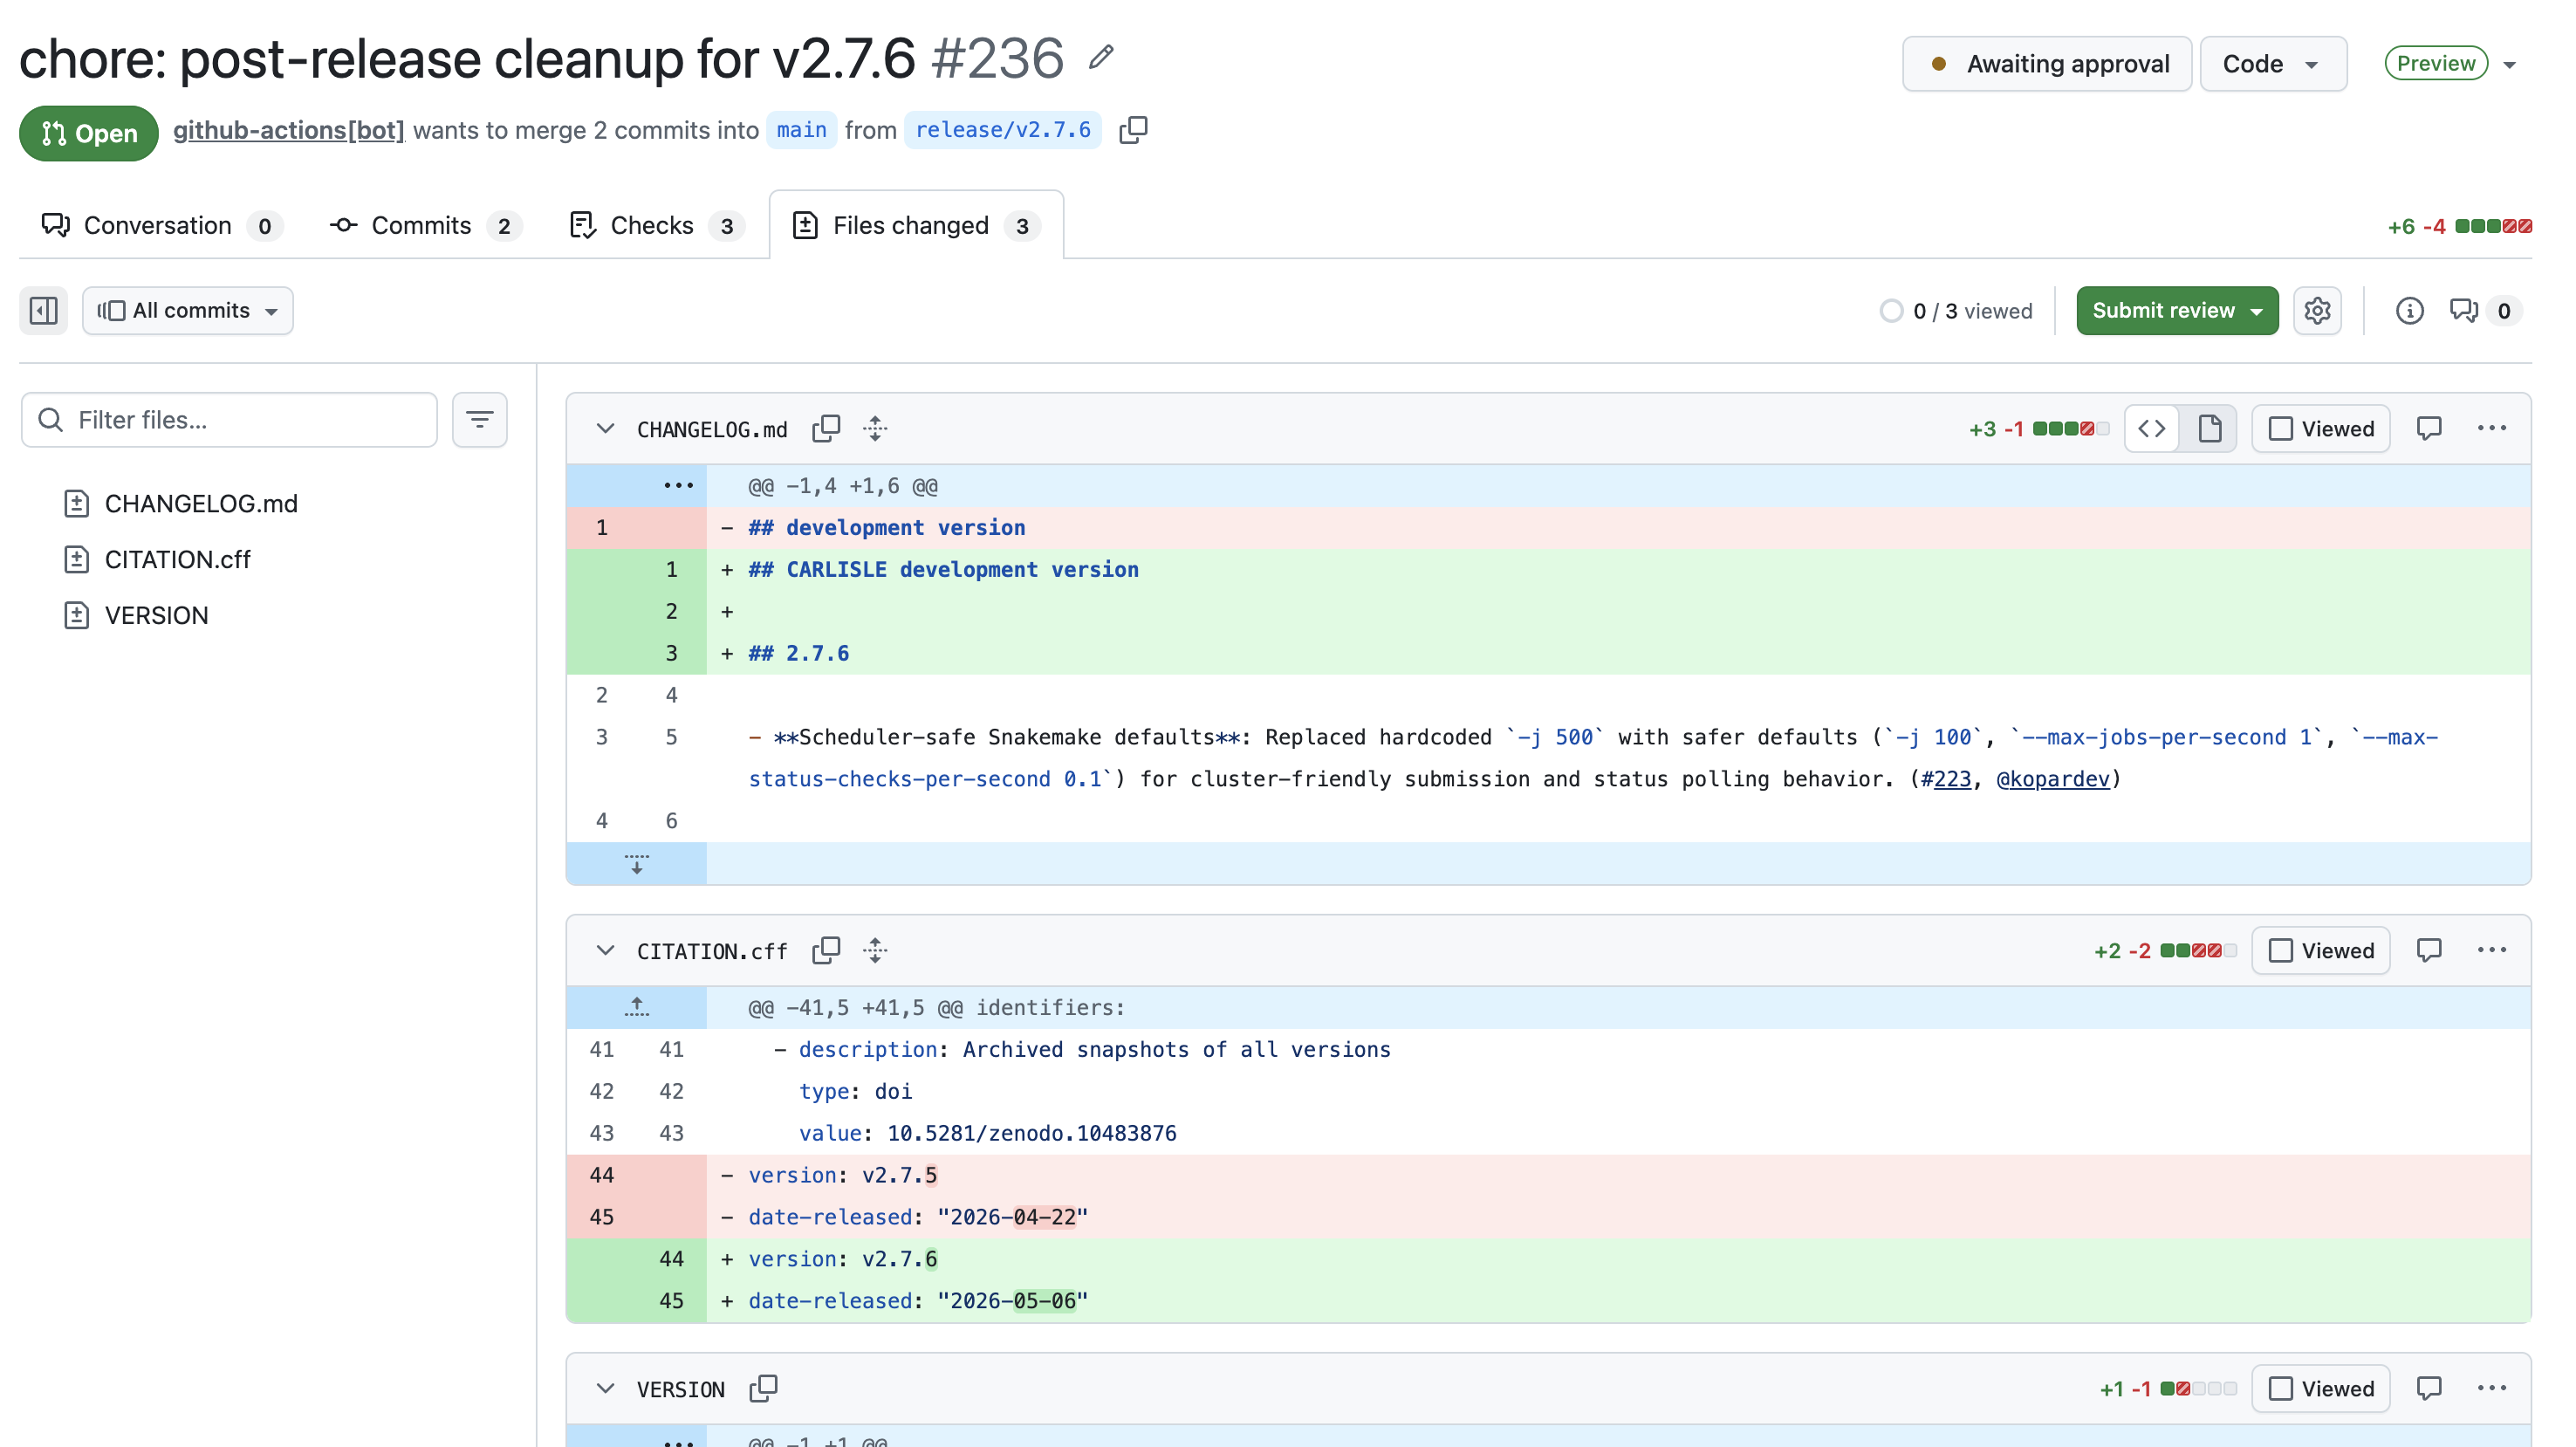
Review the Pull Request opened by the post-release workflow.
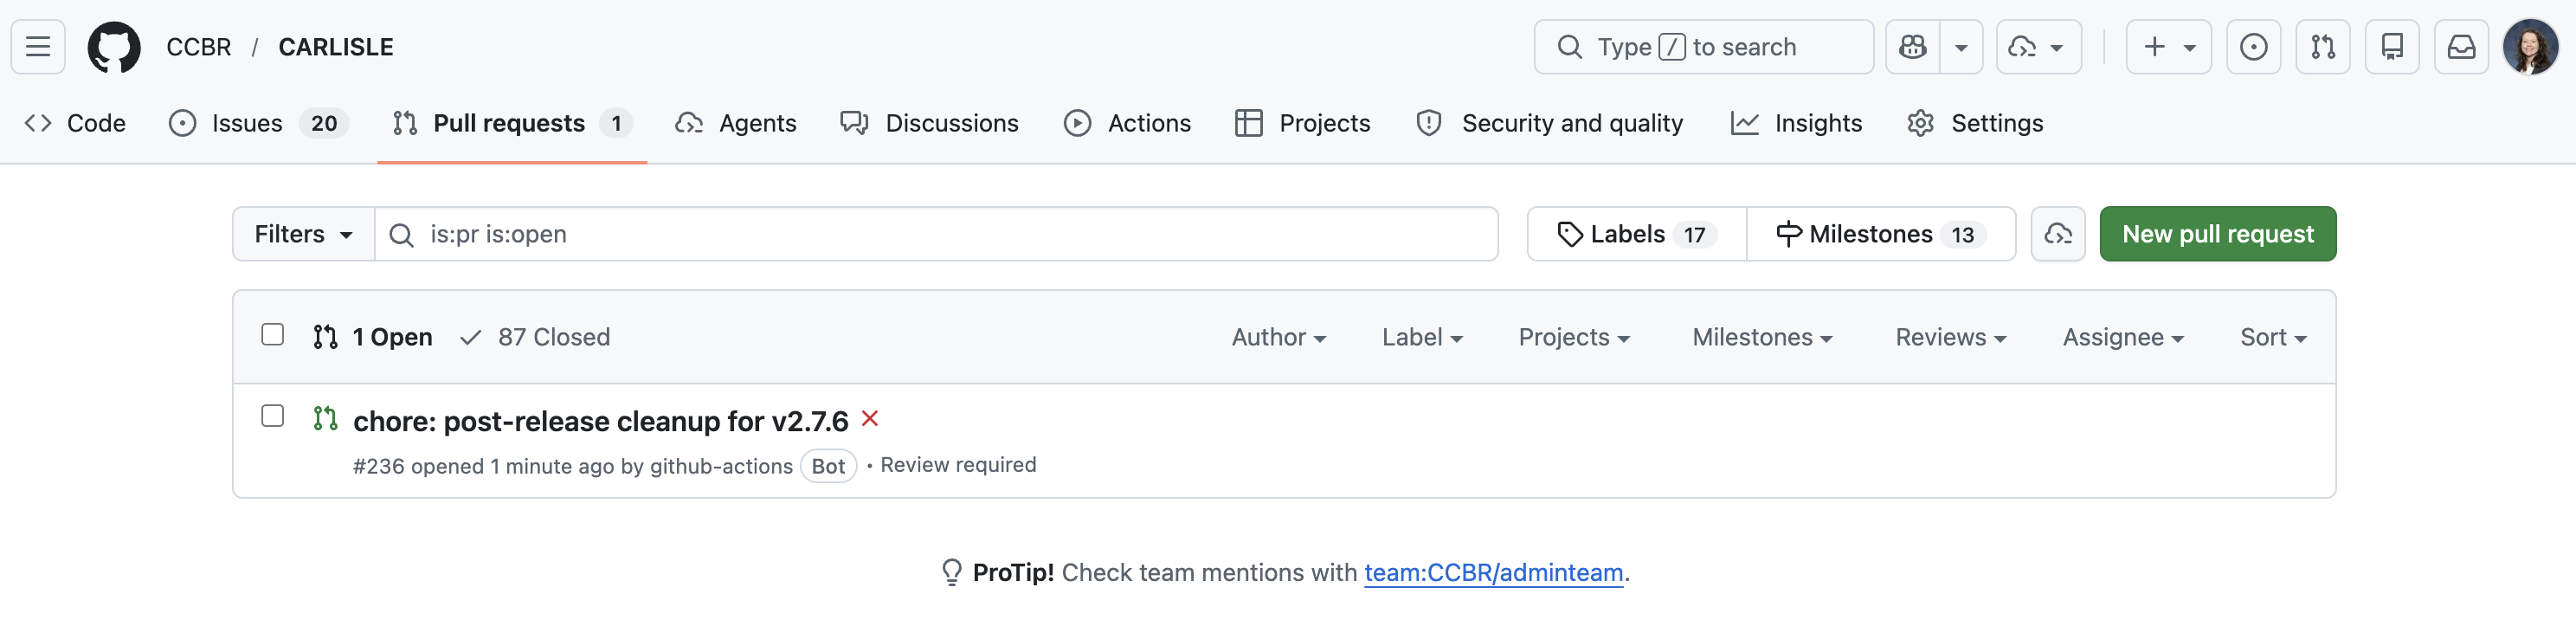
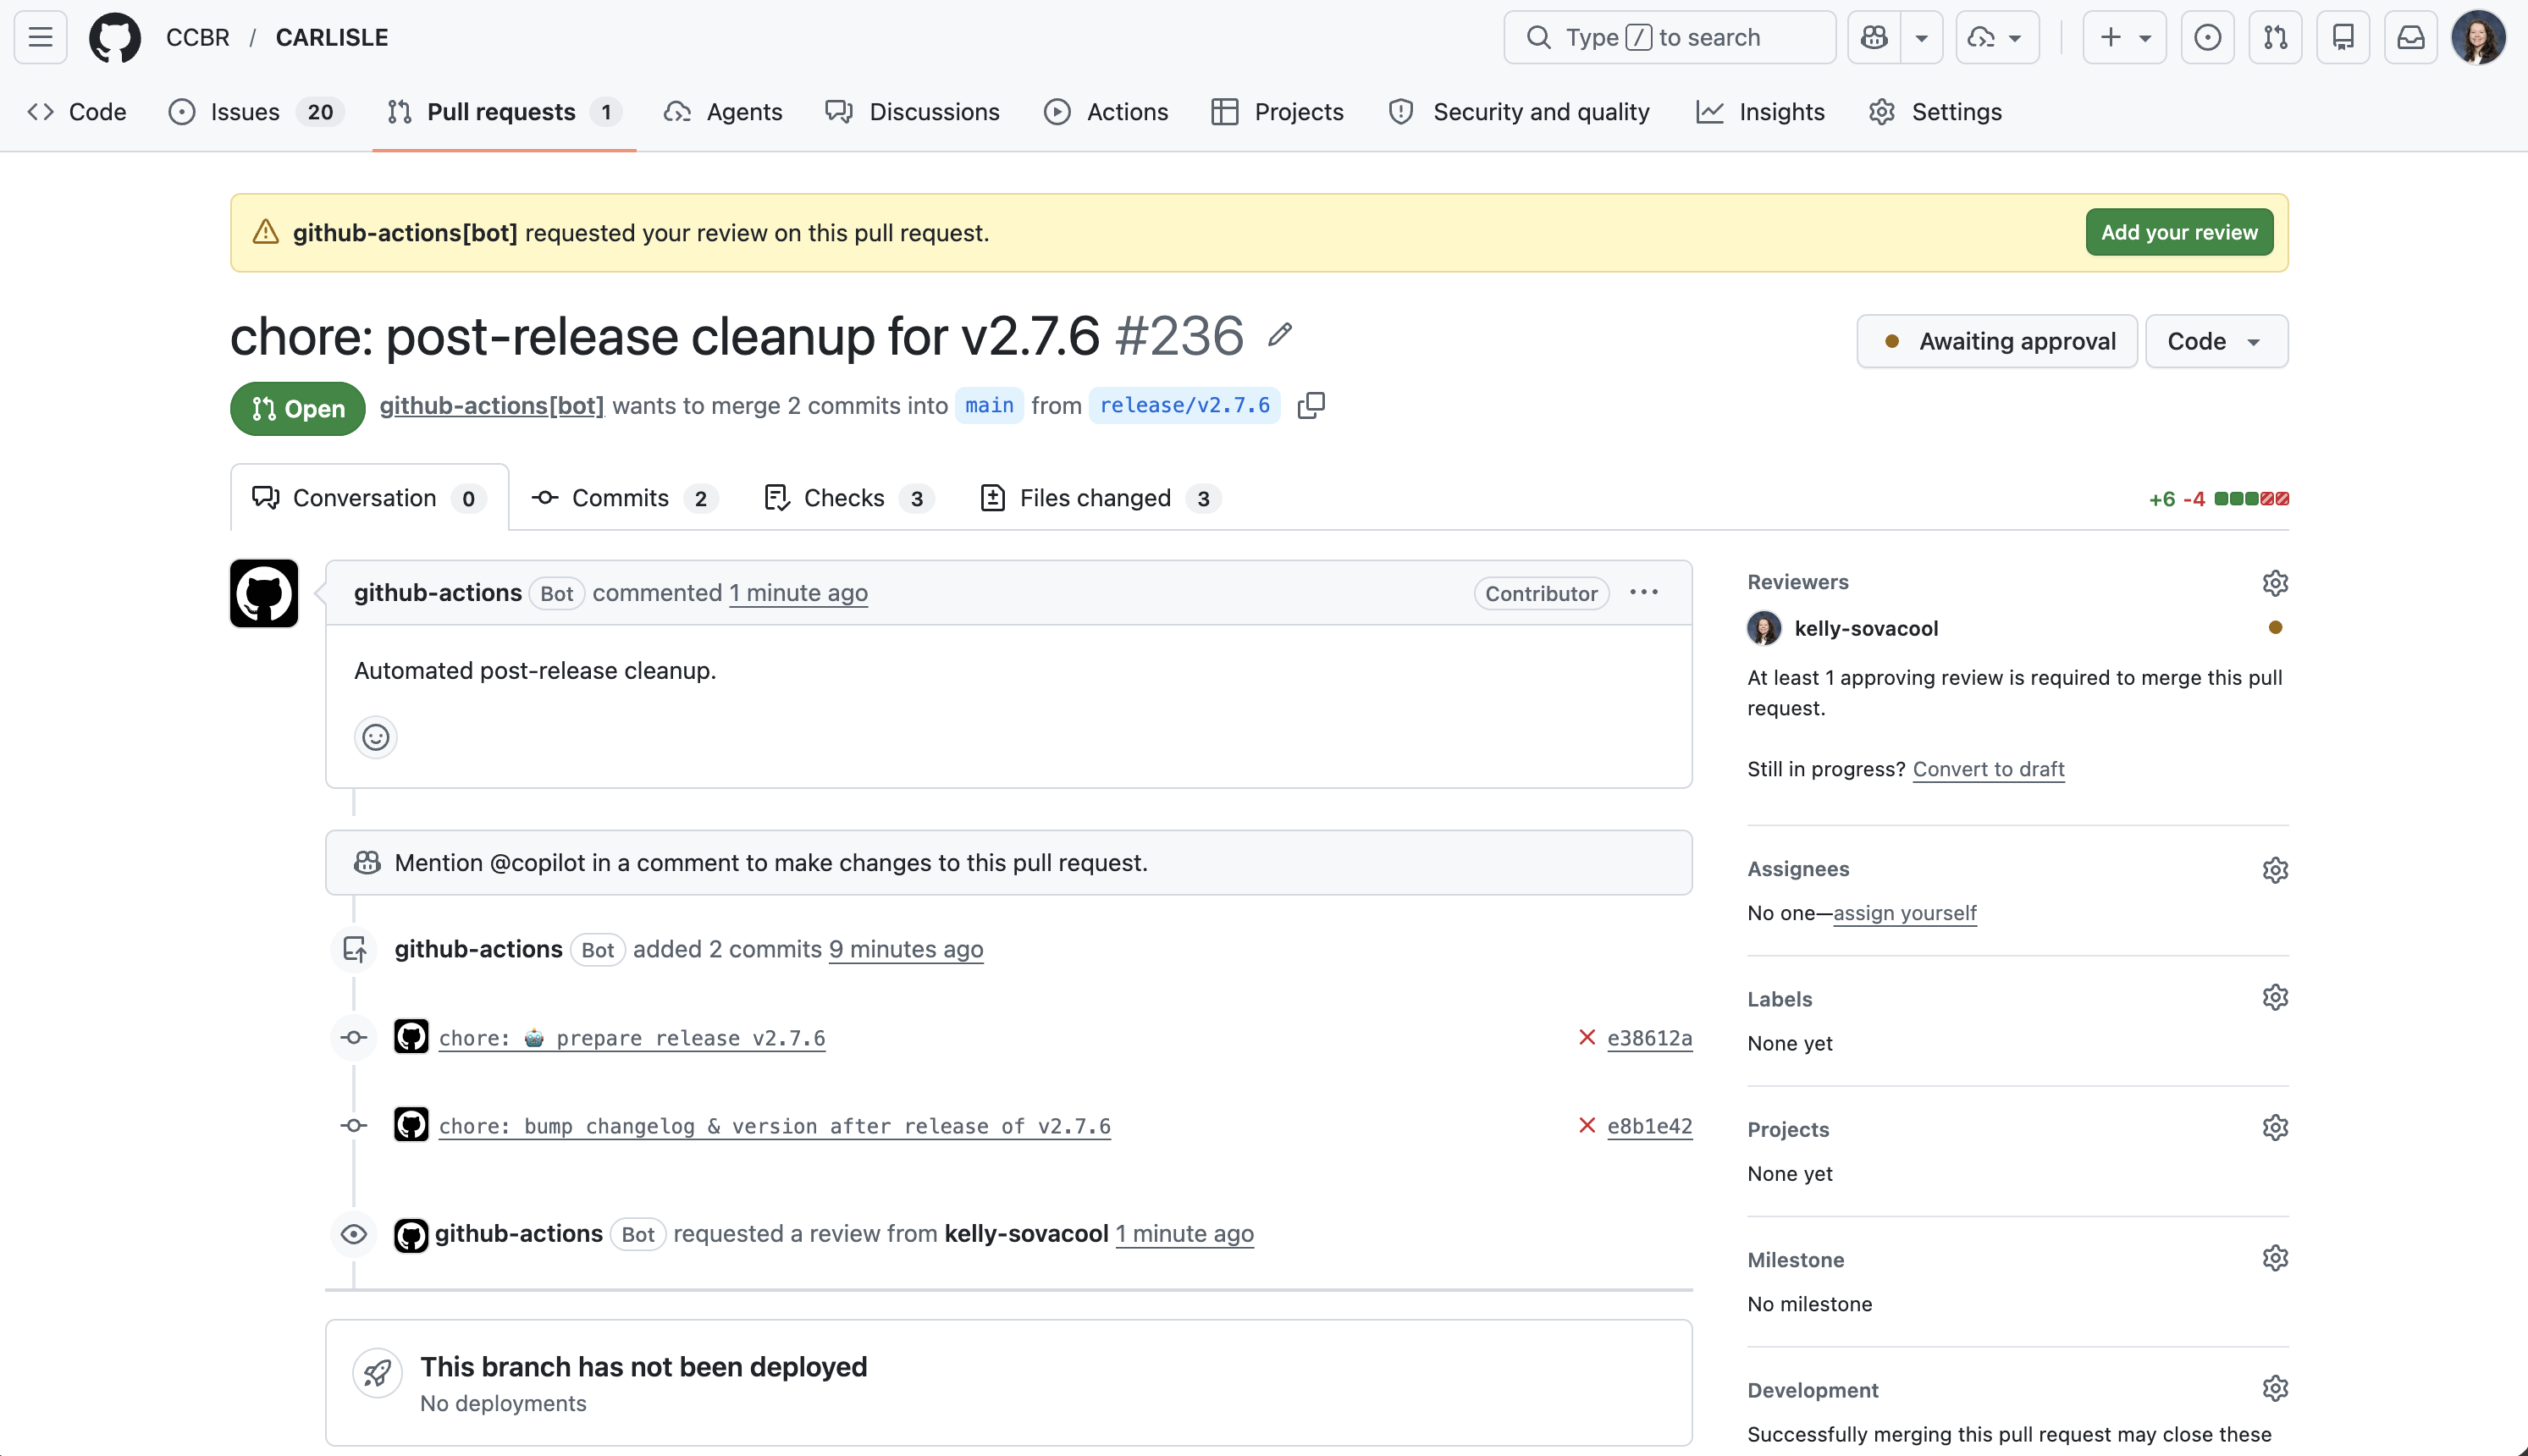
It will bump the version, changelog, and citation file to reflect the next development version.
If everything looks good, approve the PR and merge the changes into main.
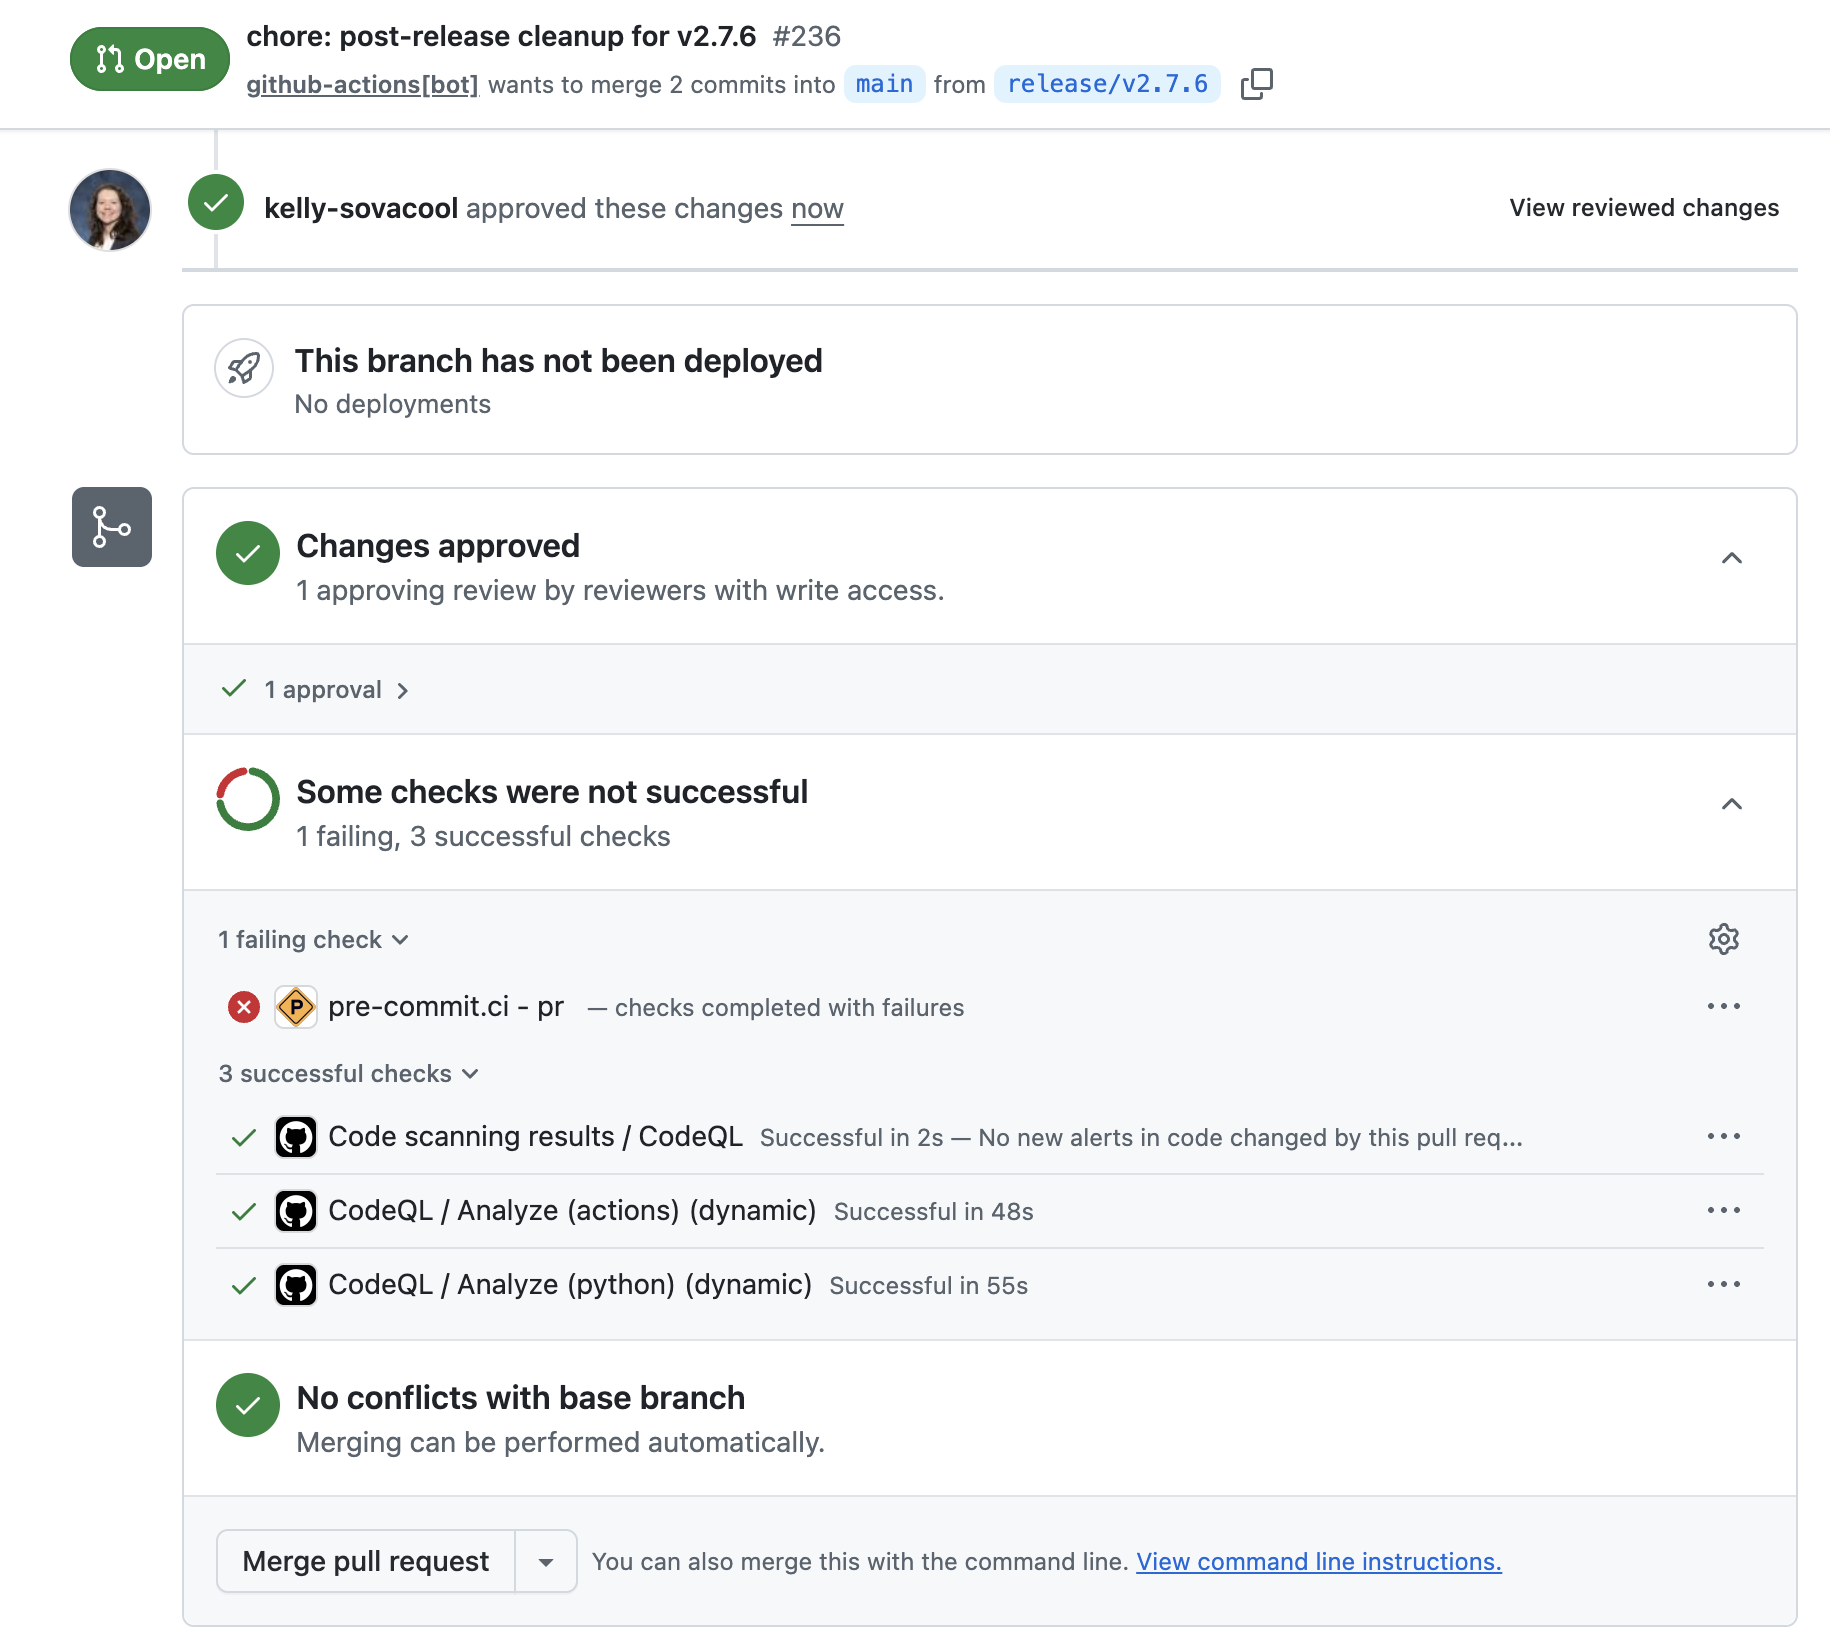
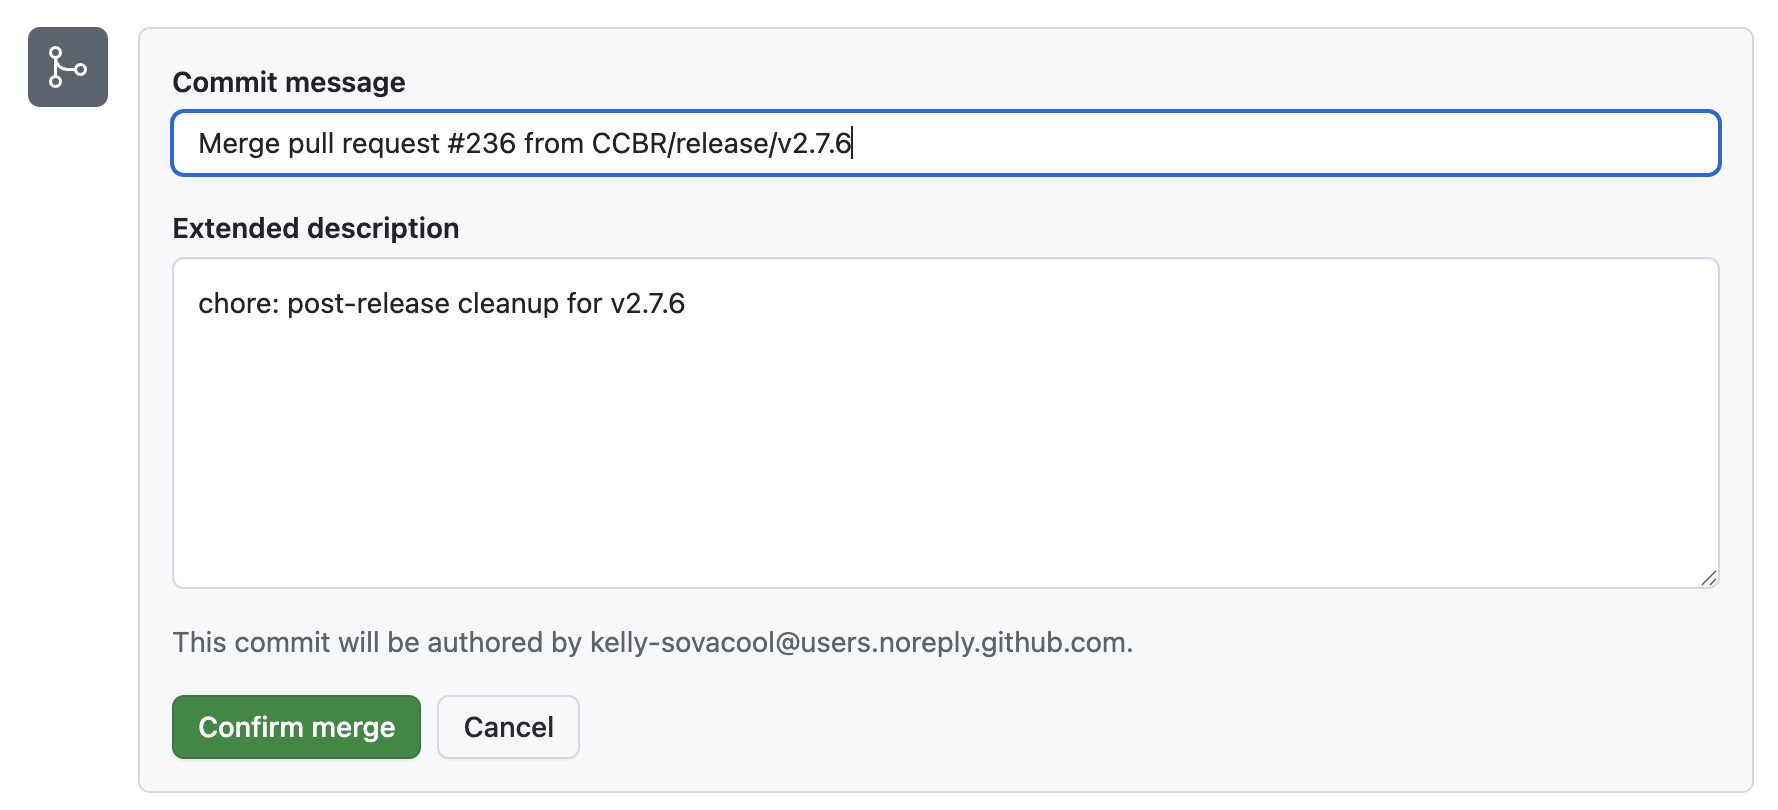
Click “Confirm merge”.
Install the new release on Biowulf.
You can skip this step if your pipeline/tool is not yet part of the ccbrpipeliner module.
Log in to biowulf and start an interactive session. Load the ccbrpipeliner module:
module load ccbrpipelinerPerform a dry-run of the installation:
ccbr_tools install carlisle v2.7.6The dry-run will print the commands that it would execute for a real run:
output
MAMBA_ROOT_PREFIX='/data/CCBR_Pipeliner/db/PipeDB/miniforge3/' && mamba activate /data/CCBR_Pipeliner/db/PipeDB/miniforge3/envs/py3.11-8
git clone --depth 1 --single-branch --branch v2.7.6 https://github.com/CCBR/CARLISLE.git /data/CCBR_Pipeliner/Pipelines/CARLISLE/.v2.7.6
chmod -R a+rX /data/CCBR_Pipeliner/Pipelines/CARLISLE/.v2.7.6
chmod -R g+rwX /data/CCBR_Pipeliner/Pipelines/CARLISLE/.v2.7.6
chown -R :CCBR_Pipeliner /data/CCBR_Pipeliner/Pipelines/CARLISLE/.v2.7.6
pushd /data/CCBR_Pipeliner/Pipelines/CARLISLE
rm -if v2.7
ln -s .v2.7.6 v2.7
chmod -R g+rwX v2.7
popd
If everything looks good, install it with --run:
ccbr_tools install carlisle v2.7.6 --runYou can verify that the installation worked by reloading the module and checking the version of the pipeline/tool:
module load ccbrpipeliner
carlisle --version
output
Pipeline Dir: /vf/users/CCBR_Pipeliner/Pipelines/CARLISLE/.v2.7.6
Version: 2.7.6