User Tutorial
Estimated completion time: 15 mins
This section offers a guided tutorial that you can follow along on Biowulf. We have provided a test data set so you can learn how to set-up and run this pipeline.
Please note: To follow along with this tutorial, you must have a Biowulf account.
Quantification and quality-control pipeline
This section provides step-by-step instructions for setting up the first pipeline (Quantification and Quality-control pipeline) and a brief description of the pipeline's output files and directories. We assume that you have already successfully launched the GUI. If not, please see Launch Pipeliner.
About the Demo Dataset
We have provided a test dataset that you can use to follow along with this tutorial. The raw data for this demo resides in /data/CCBR_Pipeliner/testdata/rnaseq/expression_demo/. This demo dataset consists of 24 paired-end FastQ files for 12 samples, originating from a human cell-line. Libraries were constructed with a poly-A selection library preparation kit. There are three groups each with 4 replicates: Cntrl, TgA, and TgB. The Cntrl samples represent a baseline biological state while TgA and TgB samples represent the same cell-line after the treatment of two drugs: A and B.
Here is a listing of all the samples in the demo dataset:
$ ls /data/CCBR_Pipeliner/testdata/rnaseq/expression_demo/*.fastq.gz
/data/CCBR_Pipeliner/testdata/rnaseq/expression_demo/Cntrl_S62.R1.fastq.gz
/data/CCBR_Pipeliner/testdata/rnaseq/expression_demo/Cntrl_S62.R2.fastq.gz
/data/CCBR_Pipeliner/testdata/rnaseq/expression_demo/Cntrl_S63.R1.fastq.gz
/data/CCBR_Pipeliner/testdata/rnaseq/expression_demo/Cntrl_S63.R2.fastq.gz
/data/CCBR_Pipeliner/testdata/rnaseq/expression_demo/Cntrl_S64.R1.fastq.gz
/data/CCBR_Pipeliner/testdata/rnaseq/expression_demo/Cntrl_S64.R2.fastq.gz
/data/CCBR_Pipeliner/testdata/rnaseq/expression_demo/Cntrl_S65.R1.fastq.gz
/data/CCBR_Pipeliner/testdata/rnaseq/expression_demo/Cntrl_S65.R2.fastq.gz
/data/CCBR_Pipeliner/testdata/rnaseq/expression_demo/TreatmentA_S66.R1.fastq.gz
/data/CCBR_Pipeliner/testdata/rnaseq/expression_demo/TreatmentA_S66.R2.fastq.gz
/data/CCBR_Pipeliner/testdata/rnaseq/expression_demo/TreatmentA_S67.R1.fastq.gz
/data/CCBR_Pipeliner/testdata/rnaseq/expression_demo/TreatmentA_S67.R2.fastq.gz
/data/CCBR_Pipeliner/testdata/rnaseq/expression_demo/TreatmentA_S68.R1.fastq.gz
/data/CCBR_Pipeliner/testdata/rnaseq/expression_demo/TreatmentA_S68.R2.fastq.gz
/data/CCBR_Pipeliner/testdata/rnaseq/expression_demo/TreatmentA_S69.R1.fastq.gz
/data/CCBR_Pipeliner/testdata/rnaseq/expression_demo/TreatmentA_S69.R2.fastq.gz
/data/CCBR_Pipeliner/testdata/rnaseq/expression_demo/TreatmentB_S70.R1.fastq.gz
/data/CCBR_Pipeliner/testdata/rnaseq/expression_demo/TreatmentB_S70.R2.fastq.gz
/data/CCBR_Pipeliner/testdata/rnaseq/expression_demo/TreatmentB_S71.R1.fastq.gz
/data/CCBR_Pipeliner/testdata/rnaseq/expression_demo/TreatmentB_S71.R2.fastq.gz
/data/CCBR_Pipeliner/testdata/rnaseq/expression_demo/TreatmentB_S72.R1.fastq.gz
/data/CCBR_Pipeliner/testdata/rnaseq/expression_demo/TreatmentB_S72.R2.fastq.gz
/data/CCBR_Pipeliner/testdata/rnaseq/expression_demo/TreatmentB_S73.R1.fastq.gz
/data/CCBR_Pipeliner/testdata/rnaseq/expression_demo/TreatmentB_S73.R2.fastq.gz
Please Note: that "R1" and "R2" do not represent the replicate number. They denote forward and reverse reads, respectively.
Pipeliner expects input files to follow a specific naming convention: <sampleName>.R1.fastq.gz, <sampleName>.R2.fastq.gz. FastQ files should end with the following extensions: .R1.fastq.gz and .R2.fastq.gz. Within <sampleName>, there are additional conventions you must follow. Please carefully read through all the rules for creating filenames.
Before you can run the expression pipeline, there are a few key pieces of information that must be provided.
Step 0. Fill out the Project Information section
This section contains three fields: Project Id, Email address, Flow Cell ID. For this demo, you can set Project Id to project. This will be the name of the pipeline's master job. Please enter your email address in the Email address field.
Step 1. Select the correct Pipeline Family
Please select rnaseq from the pipeline family drop-down menu.

Please note: The
scrnaseqoption is for single-cell data. This tutorial and pipeline are for bulk RNA-seq. To run the single-cell RNA-seq pipeline, please see its documentation.
Step 2. Select the Reference Genome
As mentioned above, these samples originate from a human cell-line. Please select hg38 from the Genome drop-down menu.

Please Note: If you select a reference genome that is not supported by the pipeline, a pop-up box will notify you.
Step 3. Select your Data Directory
If you are following along with this tutorial, you can use the included demo dataset. Please select the Open Directory button and navigate to the following path in the pop-up box:
/data/CCBR_Pipeliner/testdata/rnaseq/expression_demo/
OK. 

You should receive a message that 24 files were found. Click OK.
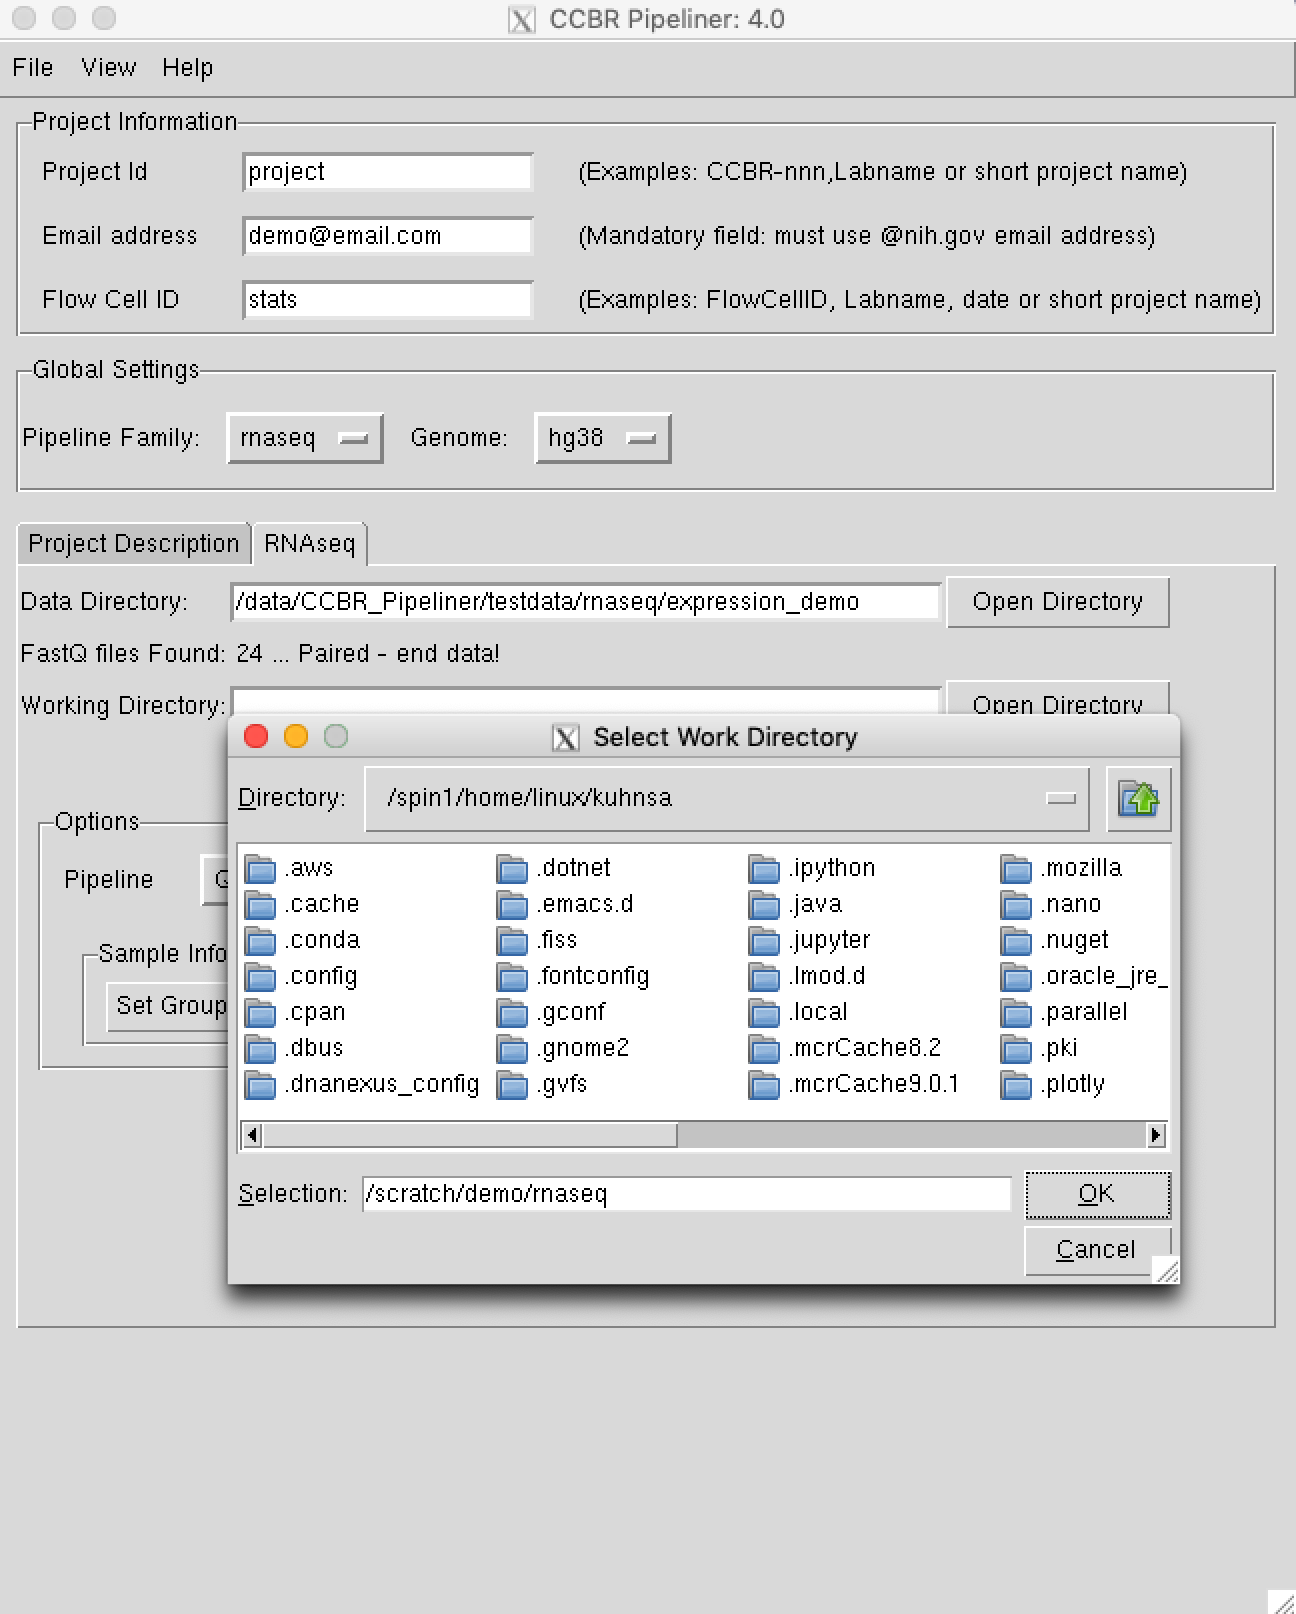
Step 4. Select your Working Directory
You are now ready to select your working directory. This is where all of the pipeline's output files will be created. In this tutorial, I set the working directory to /scratch/demo/rnaseq, but you could set it to another location like /scratch/demo/yourUserName/. The only pre-requisite is that this directory should not exist. The process very similar to the step above except, you will point to a directory that does not exist on the filesystem.
Please Note: Input and output files will be read from and written to the Biowulf's filesystem. If your raw data does not exist on Biowulf, you will need to upload it there first. Output files can be downloaded from Biowulf to your local computer for downstream analysis.
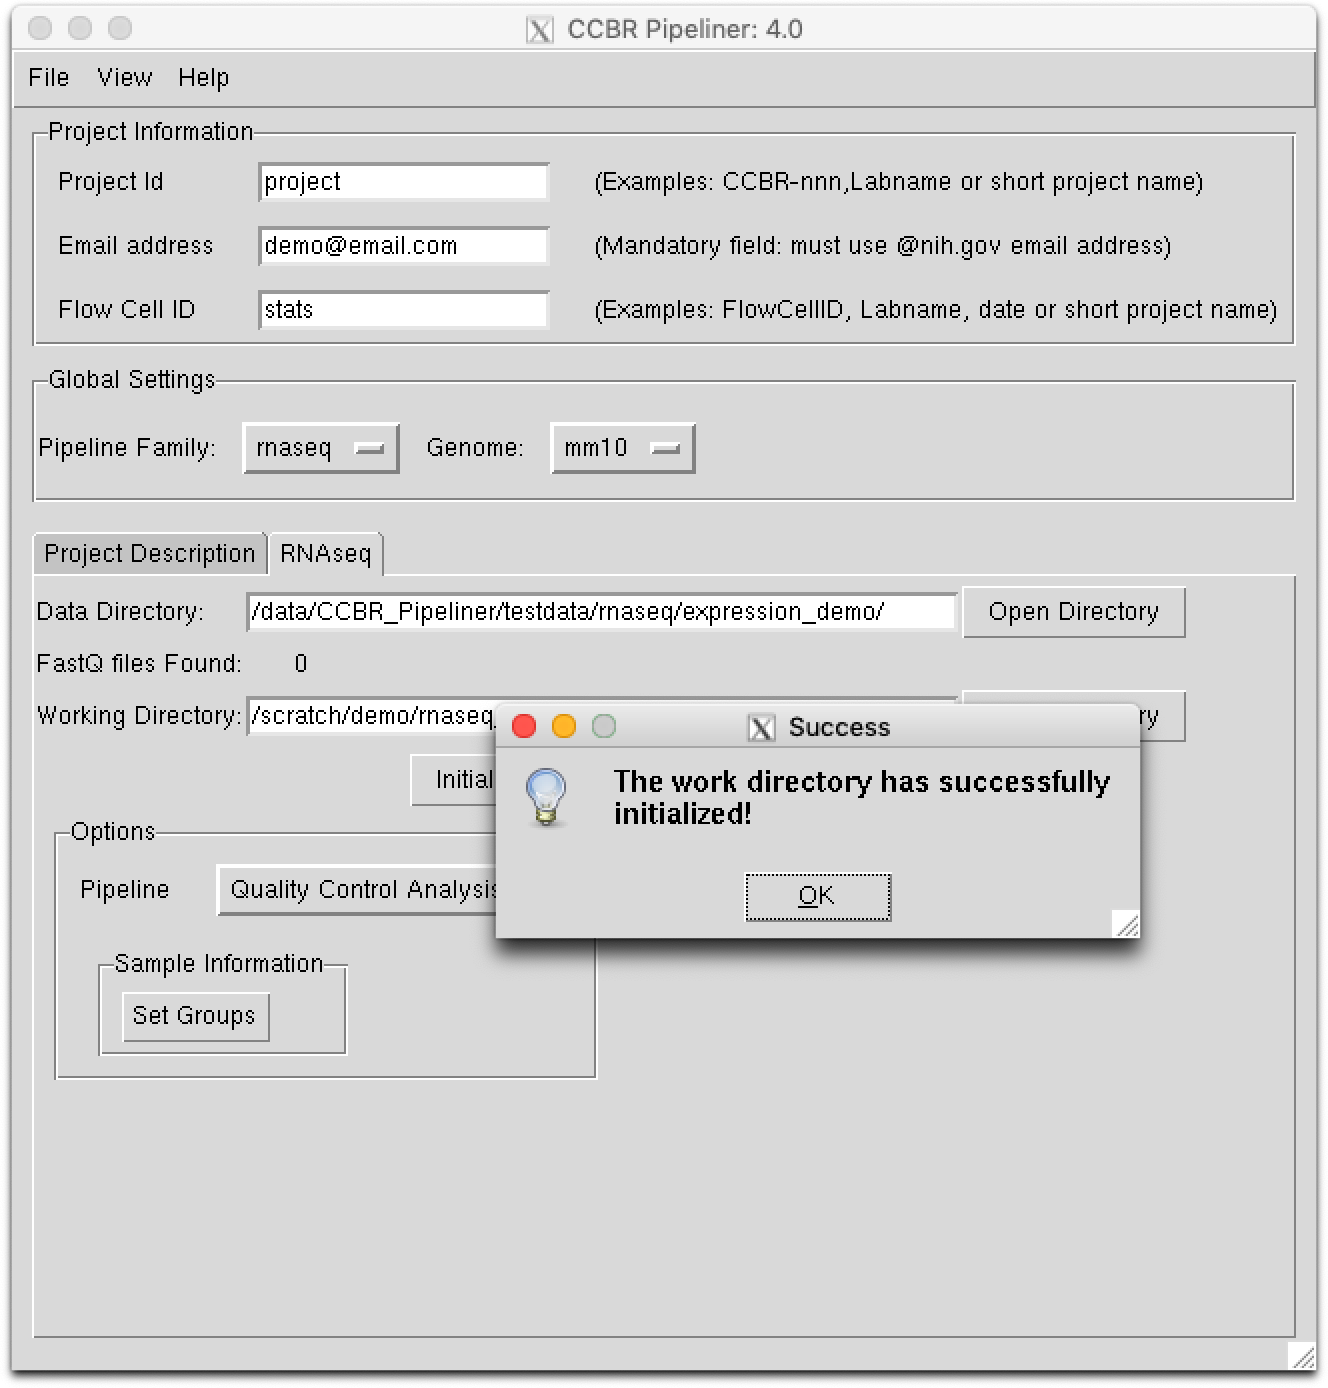
Step 5. Initialize your Working Directory
In this step, we will initialize or create the Working Directory defined in the step above. Please select the Initialize Directory button. During this step, the required resources to run the pipeline are copied into the working directory. After a few moments, you should receive a notification stating the directory was successfully initialized:
Step 6. Select the Pipeline
You are now ready to select the Quantification and Quality-control Pipeline. In the options section, please select Quality Control Analysis from the Pipeline field.
Step 7. Load Group Information
In the options, you will need to provide group information for each sample. Select Set Groups from the Sample Information section. Paste the group information below into the pop-up box and click save.
Example groups.tab file
Cntrl_S62   Cntrl   Cntrl_1
Cntrl_S63   Cntrl   Cntrl_2
Cntrl_S64   Cntrl   Cntrl_3
Cntrl_S65   Cntrl   Cntrl_4
TreatmentA_S66  TgA TgA_1
TreatmentA_S67  TgA TgA_2
TreatmentA_S68  TgA TgA_3
TreatmentA_S69  TgA TgA_4
TreatmentB_S70  TgB TgB_1
TreatmentB_S71  TgB TgB_2
TreatmentB_S72  TgB TgB_3
TreatmentB_S73  TgB TgB_4
Step 8. Dry-run the pipeline
Please select the Dry-run button. This will generate the pipeline's Snakefile, run.json, and it will dry run the pipeline. This step take about 10-20 seconds to run, so please be patient until another window pops up with DAG information:

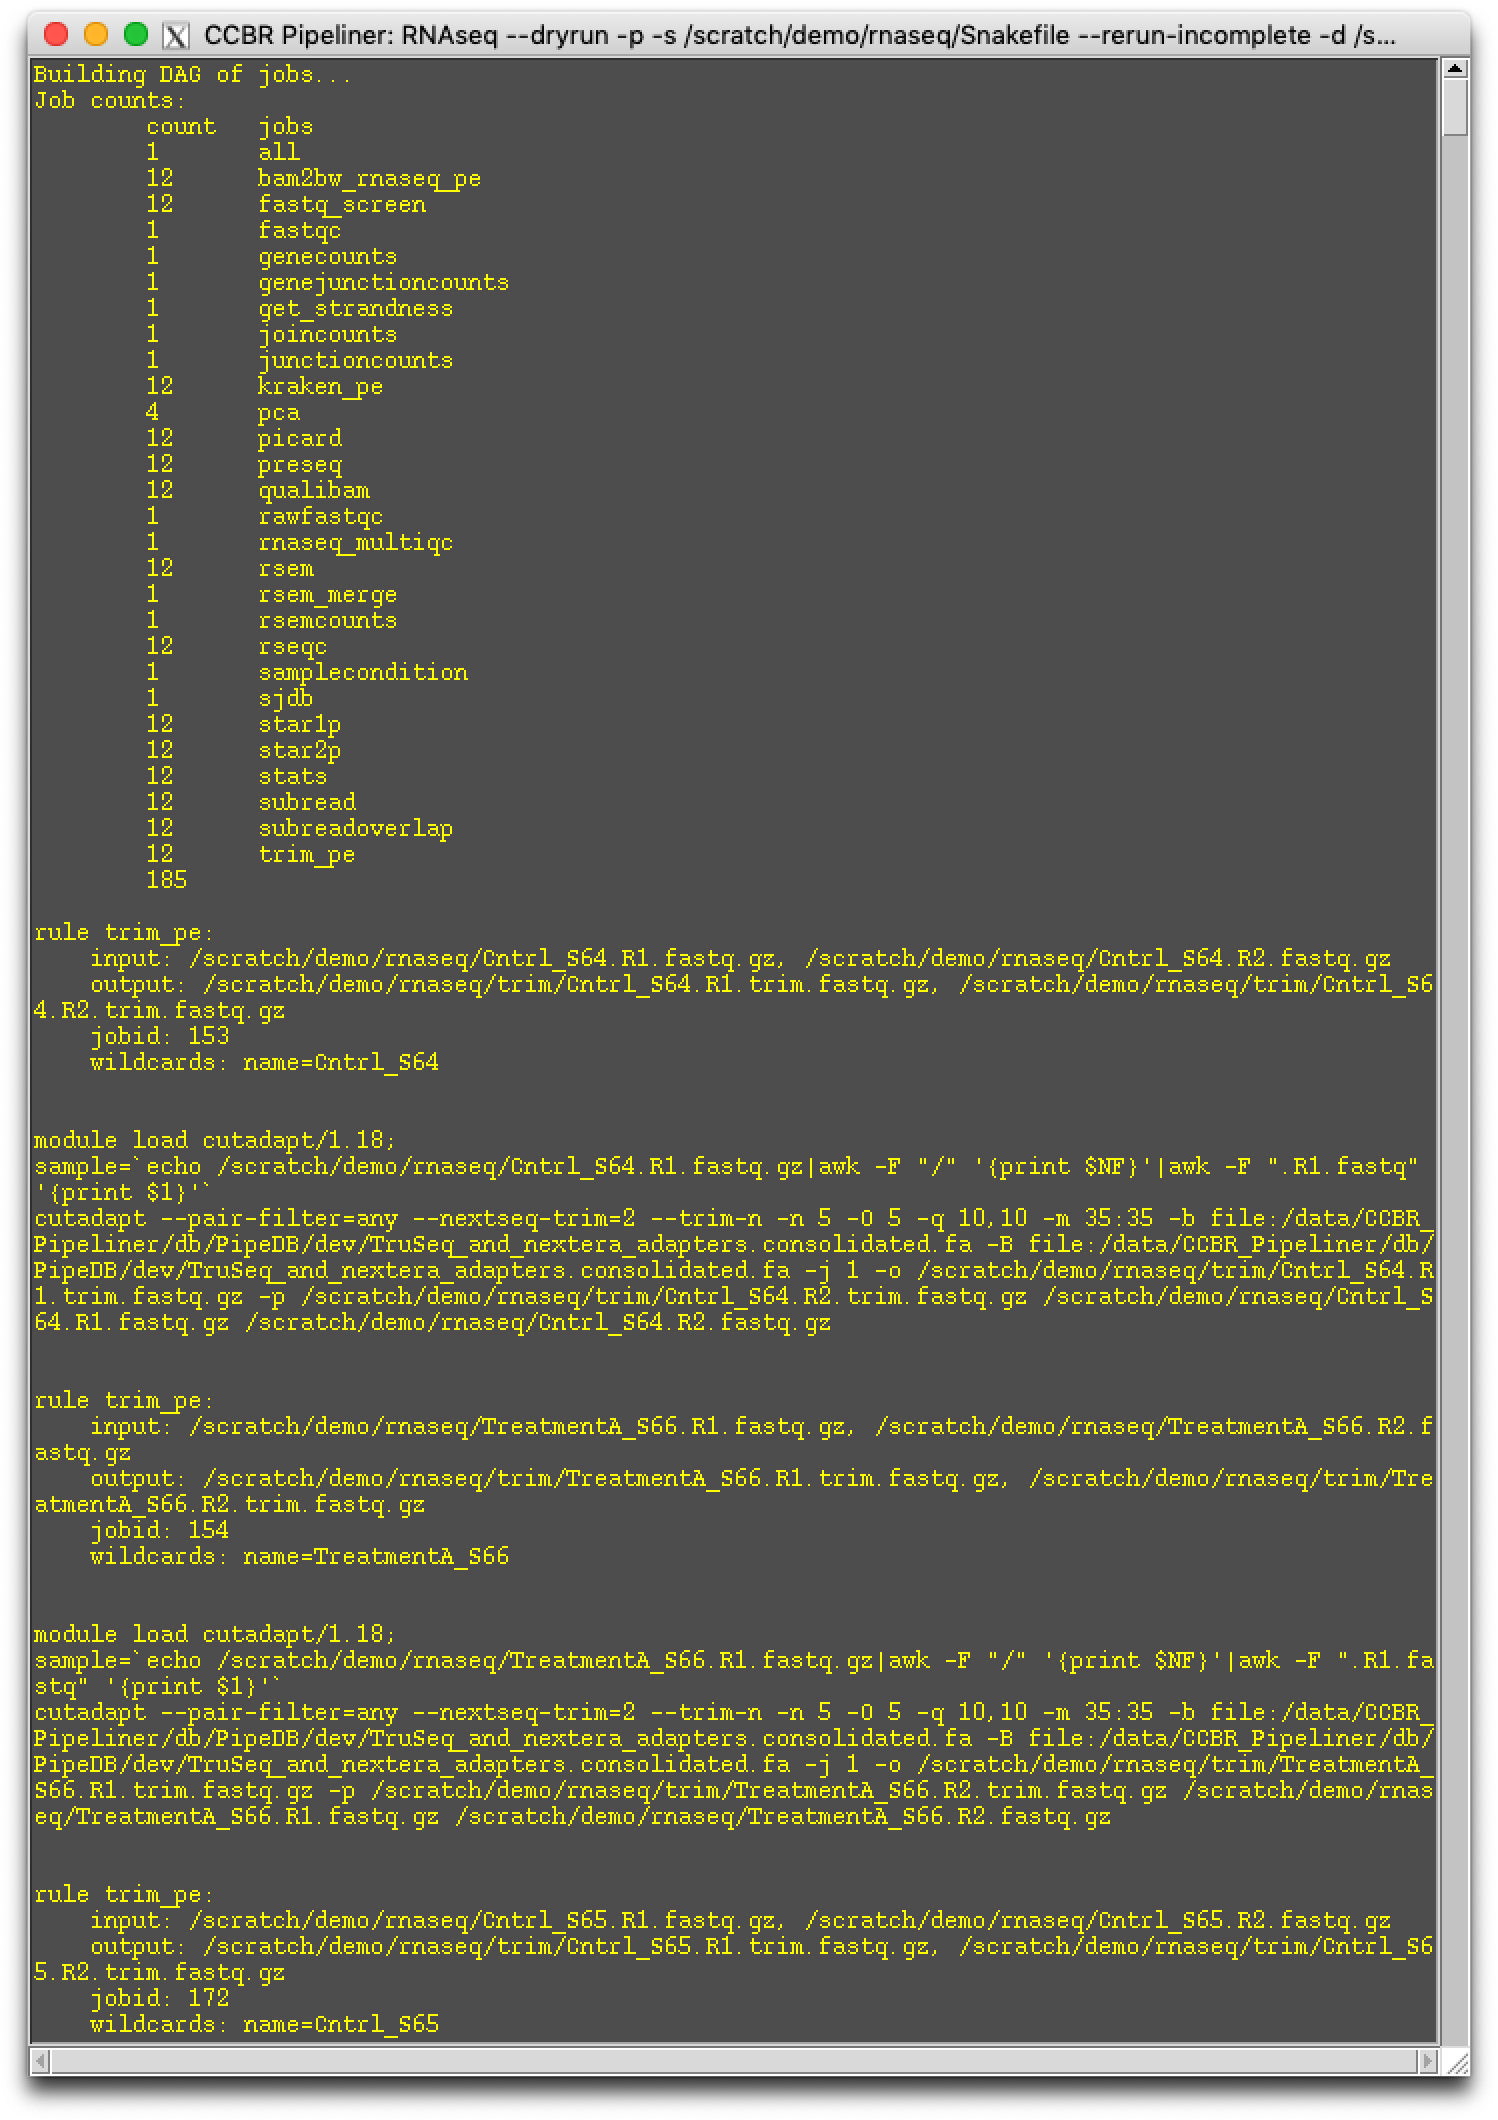
If there is no error in the Dry Run, please close the dry-run popup box and proceed to the next step.
Step 9. Run the pipeline
You are now ready to run the Quantification and Quality-control pipeline! Please select the Run button. In a few moments, a pop-up box will appear stating that the job is starting. Please select OK. Once OK is selected from this popup box, the job will be submitted to the SLURM queue on Biowulf.

That's it! You will receive an automated email when the pipeline starts and ends.

You can now close out of the GUI. It should be noted that this pipeline takes around 3-4 hours to run.
Check Progress
If you are curious to see what jobs are running, you can run sjobs (or squeue -u $USER). All of Pipeliner's jobs begin with the prefix pl:.

Before running the second pipeline, it is important to ensure the pipeline has run to completion. There are a lot of factors that can cause a job to fail, some of which are out of our hands. To see if all the jobs have finished successfully, navigate to the Reports directory within your working directory, and examine the last few lines of the snakemake.log file. This file tracks the progress of all the jobs that get submitted to the cluster. If the pipeline has run to completion, it will look like this:

If the pipeline reports that it's (100%) done, you are ready to run the Differential Expression Pipeline.
You can also verify that all your jobs have completed by checking out the following file in your pipeline's working directory: HPC_usage_table.txt. This file doesn't appear until all jobs are finished. It contains information about each job submitted to the cluster. Here are columns in this tab-delimited file:
1 JobName
2 Jobid
3 Partition
4 State
5 Nodes
6 CPUs
7 Walltime
8 Runtime
9 MemReq
10 MemUsed
11 Nodelist
12 MaxCPUUsed
13 Queuetime
14 CPUHours
15 Account
16 Username